Artisans Russian Lacquerware Projects
Please note that you must provide your own materials for the following projects.
Egg Decorating Project (Pysanka By Madame Zoya) – Traditionally eggs are exchanged at Easter time between family and friends. There are many symbols in the patterns as well as meaning in the color. Young children were given mostly white eggs and older people were given darker colored eggs.

The Psyanka comes originally from Ukraine. The patterns vary from village to village. The villages in the valleys tended to have floral patterns. The mountainous regions preferred the more geometric patterns. There are other styles of eggs throughout Russia: wooden eggs which are painted or inlaid with small beads; or chicken eggs which are painted one color and then the pattern is scratched into the shell.
People have enjoyed this custom of decorating eggs for over 2000 years. In creating these delicate treasures, the peasant folk believed that great power was embodied in the egg. They decorated eggs to celebrate the warming of the sun as it brought new joy and vigor to life. Spring was the logical time for celebration since the cold, dark winter was past. The sun warmed the soil again, and life was no longer such a constant struggle. What a welcome change! A farmer might be presented with an egg decorated with shafts of wheat wishing him a bountiful harvest. Rakes and other tools can be included to signify the “wish” for him to practice the art of farming with success. Young married couples are often presented with an egg decorated with a chicken design, the symbol of fertility. Important elements of the design are Ribbons and Lines. The “Endless Line (Bbezkonechnyk)” represents the everlasting cycle of life. The line goes around the egg, meets itself and starts over again.
Colors –
- White – Purity and innocence
- Yellow – Youth, happiness, love kindness
- Orange – Everlasting sun, strength and endurance
- Light Green – Spring, new growth, hope, freedom from bondage
- Light Blue – Sky with life giving air and good health
- Red – Sun, happiness, life, hope and passion
- Dark Red – Harvest color denoting gathering of fruit in the fall
- Black – Eternity, darkest time before dawn
- Pink – Success
- Royal Blue – Royal color, higher life and trust
- Brick/Brown – Mother Earth color bringing forth bounty
- Purple – Faith, patience, trust and fasting
- Dark Green – Bountifulness, hope, victory of life after death
Symbols –
- Rooster – Rich married life blessed with many children
- Hen – Fertility
- Deer and Horses – Good Health, Wealth, Leadership and Prosperity
- Rams – Strength, Leadership, Dignity and Perseverance
- Spiders – Patience
- Fish – Life
- Wolves’ Teeth – Protection, Loyalty, Wisdom and a Firm Grip
- Flowers – Love, charity, and good will
- Sunflowers – The warmth of the sun Roses – Love and caring
- Evergreen Trees – Eternal Youth
- Empty Rose – Beauty and wisdom
- Grapes – The growing church, wine
- Wheat – Good health and bountiful harvest
- Triangles – Holy Trinity
- Cross – Ancient symbol of good luck
- Rakes – Good husbandry and prosperity
- Ladders – Prayers, ascent to heaven
- Diamonds – Knowledge
- Water – Wealth, bountiful harvest
- Curls/Spirals – Defense and protection
- Meandering line – Everlasting life
- Sun – Life, growth and good fortune
- Star – God’s love towards man, purity and life

Russian Painted Wooden Spoons Project – One very popular traditional Russian craft is painting wooden spoons. There are books on this artform in the bookstore and library at Fort Ross Visitor Center. Check out your local library for books on Russian crafts.
Supplies needed –Wooden spoons Red, yellow and black NON-TOXIC paint Small-tipped brushes
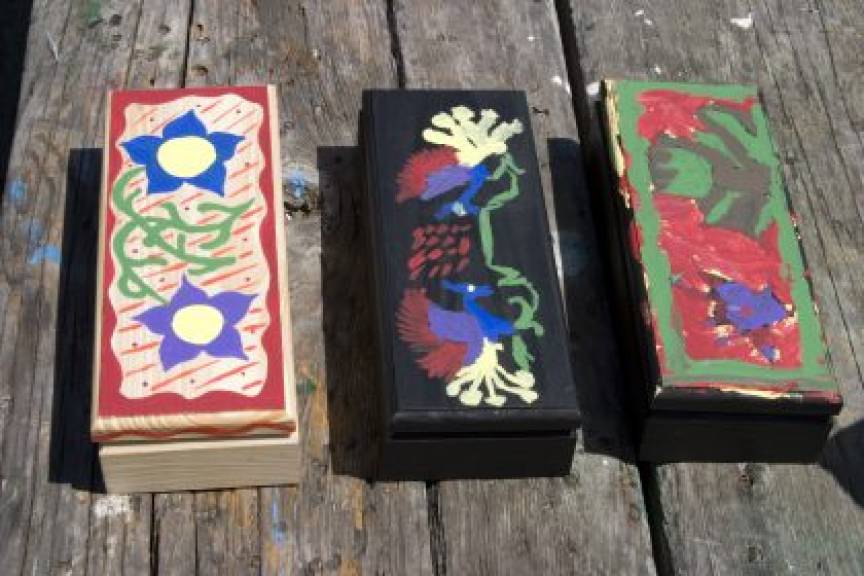
Russian Lacquer Box Project –
Supplies Needed –
- Unfinished Wooden Box, pre-assembled
- Small screwdriver
- Fine-tip Paint Brush
- Glue
- Deco Art Dazzling Metallic Glorious Gold Paint – 2 oz
- Envirotex-Lite 8 oz (Polymer Coating)
- Ceramcoat Glossy Exterior Varnish 8 oz
- Color photocopy on cardstock paper pictures of Russian scenes for decorating. You can use actual lacquer box paintings from book, The Fine Art of Russian Lacquered Miniatures, by Vladimir Guliayev
- Black paint
- Foam Brush for black paint (small size)
- Foam Brush for varnish
- Ultrafine pastel glitter – Light blue or lavender (1 tube)
- Wooden craft, popsicle sticks to stir Envirotex-Lite Polymer solution
- Paper cup
- Wax paper
- Aim-a-flame Instant lighter
Procedure –
- With a small screwdriver, remove hinges and front latch from box. Save
- Paint entire box, inside and out with black paint – two coats
- When dry glue on cutout Russian scene
- Using fine-tip brush “Dot” around the perimeter of the top and sides with gold metallic paint. Let dry for ½ hour
- Mix Envirotex-Lite in disposable paper cup (about ½ “ of each part together)
- Add just a tiny pinch of Ultrafine glitter
- Stir for 2 minutes; pour coating on just the top of the box. Spread evenly
- Then according to the directions “flame” the air bubbles out of the coating
- Let dry for at least 24 hours on wax paper without touching
- When completely dry varnish the remainder of the box with Ceramcoat Glossy Exterior Varnish and foam brush. Let dry completely for 1 hour
- Screw back on hinges and front clasp
Russian Lacquer Pin Project
Supplies Needed –
- 1 precut wood “football” shape. Approximately 3 ½” x 2” finished
- Fine-tip Paint Brush
- Glue
- Super Glue
- Pin backing for pin – clip
- Deco Art Dazzling Metallic Glorious Gold Paint – 2 oz
- Envirotex-Lite 8 oz (Polymer Coating)
- Color photocopy on cardstock paper, pictures of Russian scenes for decorating. You can use actual lacquer box paintings from book The Fine Art of Russian Lacquered Miniatures, by Vladimir Guliayev
- Black paint
- Foam Brush for black paint (small size)
- Ultrafine pastel glitter – Light blue or lavender (1 tube)
- Wooden craft, popsicle sticks to stir Envirotex-Lite Polymer solution
- Paper cup
- Wax paper
- Aim-a-flame Instant lighter
Procedure –
- Paint wooden “football” with black paint – two coats
- When dry glue on cutout Russian scene
- Trim edges of pin if paper extends over sides
- Mix Envirotex-Lite in disposable paper cup (about ½ “ of each part together)
- Add just a tiny pinch of Ultrafine glitter.(miniscule amount)
- Stir for 2 minutes; pour coating on just the top of the pin. Spread evenly
- Then according to the directions “flame” the air bubbles out of the coating
- Let dry for at least 24 hours on wax paper without touching
- Using fine-tip brush “dot” around the edges of pin with gold metallic paint. Let dry for ½ hour
- Super glue the pin backing. Paint on date and/or name on back for authentic finish
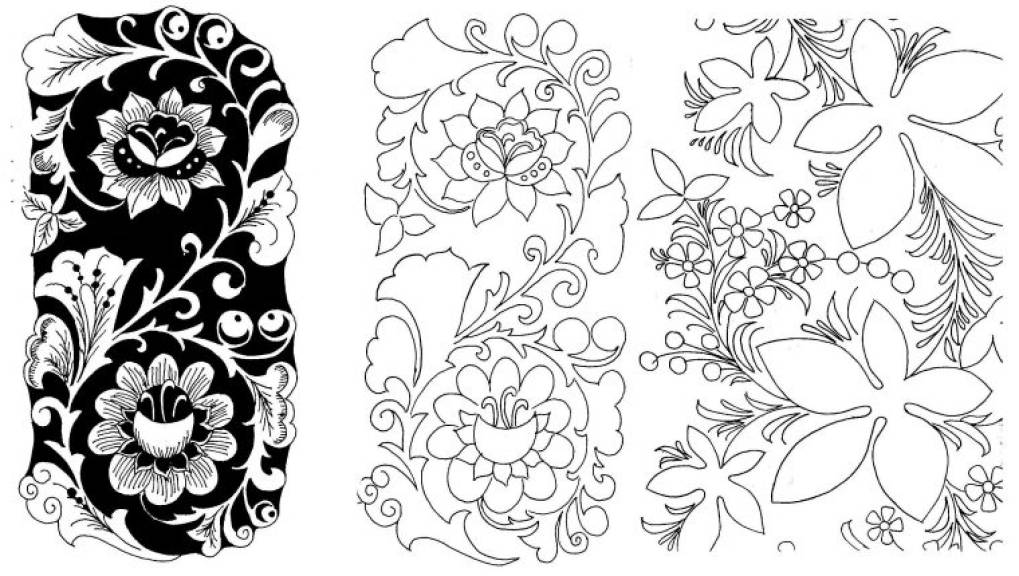
Khokhloma Patterns – Khokhloma (named after the Russian village where it was created) is a 300-year old Russian tradition of decorating wooden boxes, spoons, bowls and vases. Linden logs are harvested and seasoned for two years. Some are selected by wood carvers, while others are sent to the turning shops, where the same lathes from the time of Peter the Great are still used today. After the shaped pieces have dried in the kiln room, a thin layer of clay “primer” is applied and it is dried again. Three coats of oil are then applied and the surface is ready for tinning. The piece is kiln dried once more and the shiny, silvered work is now ready for the artist’s hand. The silvered piece is hand painted without any initial sketching, ensuring that it is an original, unique work of art. These are some patterns you can transfer onto wooden boxes, spoons, bowls and vases to create your own Khokhloma art.